Tuesday, August 31, 2010

What should I show you today?

Wanna see another mug rug? I did one yesterday.....and I'm pretty sure it'll be going to my sister-in-law for her birthday. She's a tea/latte (did I spell that right????) and loves big mugs. I love match-matchy stuff, so naturally I had to try to match the mug as well as I could even though you can't see it so good on the first pic:

Pretty Rug/Happy Mug

Let's see if this helps:

Birthday Mug & Rug

Looks good, huh? Hey, what wouldn't look good with one of my famous monster cookies??? One of these days, I might have to cave and give you the recipe. LOL Everyone LOVES them!!! BUT, back to sewing........

About 2 weeks ago, I discovered (being the angel doll swap mama and all) that we would need an angel quilt for a very special lady. Her partner was unable to fulfill her obligations and was kind enough to let us know ahead of time, which was wonderful. After thinking about it for probably 45 minutes, I knew I couldn't send her one of the ones I already had finished, but had to make one especially for her. Call it a challenge! I wanted to depict her in fabric. I studied her flickr stream, discovered what she liked, and hoped that I had my bases covered. You tell me! Think it looks like her?

"Birdy Sings for Me"

Close-up

She touched my heart when she said she had to get herself a red with polka dotted coffee mug and it'd be perfect! How cool is that?


What should I show you today?

Saturday, August 28, 2010

Whatsa Mug Rug?

Have you ever heard of such a thing? Not me!!! ('Course, I'm old and don't get out much anymore......BUT, wouldn't you know it, they are having a mug rug swap on Flickr and NATURALLY, I had to join.) The swap hasn't even really started yet, and partners haven't been assigned, but I just HAD TO try my hand at this. Now, I'm a Diet Pepsi girl, so don't have lots (like ANY without dumb pictures of cars on them) mugs, so had to go shopping. Awwww....what a shame! I was all over, but TJ Max seemed to be the best for variety and expense. Thursday I picked up two and yesterday, I made this:

Big mug - little matching rug

Now the really funny thing about this is........I made about a million cute doll quilts, right? Some that took 3 whole days. This crazy little thing took about 3 hours, start to finish, and it made EXPLORE on Flickr today. What's with that? None of my doll quilts did! Goofy! (But, guess who'll be making more?) I was back at TJ's yesterday. Anyone need a new mug with matching rug???

Tuesday, August 24, 2010

This is all I can show you!

I know you are going to be disappointed, but this is all I can show you today!

Todays Pickins

What, you say? Tomatoes? I know you're saying, hey babe, this is a sewing site......we're here to learn stuff and see new things......why are you showing us those dumb tomatoes? Well, actually, I have been really busy, I mean really busy, but I can't show you anything. I made an angel quilt for the doll swap (hopefully, the last one) but this was for a special person and since I found out that she needed one before the swap deadline, I thought I'd make one especially for her. If I post it, she might know it's for her and the surprise will be over.

Then, I made 24 teeny tiny 3.5 inch Halloween minis for that swap, but since the sign-ups aren't even over yet, I can't show you those either. So, besides the 12 quarts of pickles that I put up two weeks ago (and you never know, pictures of those might be forthcoming yet), you'll have to settle for the picture of my daily pickings of tomatoes. I sure wish I could share them. I'm almost "tomatoed out".

Thursday, August 19, 2010

Chickenfoot #3

I really wasn't going to do it. I figured I'd done enough... and there are so many mamas....and I had no idea how I'd get everyone on..... until FlossieBlossoms gave me a brilliant suggestion that even had me laughing! Oh man, I don't know what I would do without her sometimes!!!! And after that, I just HAD to make another Chickenfoot Quilt for this DQS round. I actually was going to go another route until I started drawing and realized that this way would be the easiest and use the space I needed to at least show 6 of the 12 mamas in their glory. First, the drawing......which, incidentally almost took me one whole day:

Then of course, onto the tracing, fusing, and ironing.........I don't think I've shown you this mess before and this was only one place when I needed to sit down for breaks. My kitchen island looked just as bad, as well as the floor where all the schnibbles fell with the breeze from the back door.

Here, I'm in the process of fusing the pieces to the backgrounds. I mainly do all of that first and then sandwhich the whole mess in order to free motion applique stitch and quilt.
Then, I showed my first sneak peek on Flickr:

DQS9 Sneak Peek

And the next day, I posted this:

Sneak Peek #2

One more sneak peek the next day (I do tend to get carried away, I'll admit!):

Sneak Peek #3

Then today, my friend, Shirley and I met Susan (aka "Chickenfoot") at the quilt shop for a day of shopping and lunch and I gave her this quilt to add to her growing collection:

Chickenfoot & the 12 Mamas...the early years!

I think it sums it all up in a cute 21 by 19 inch package! Note that since I'm the oldest, I have no egg shell residual but do have my halo since I am the official angel mama, you know.......(besides, since I made it I can make myself look good. LOL)

Sunday, August 15, 2010

Dolly Quilt Queen

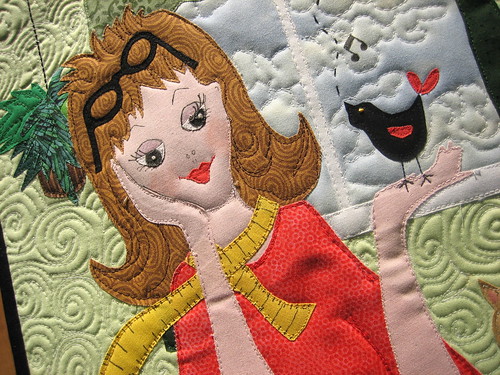
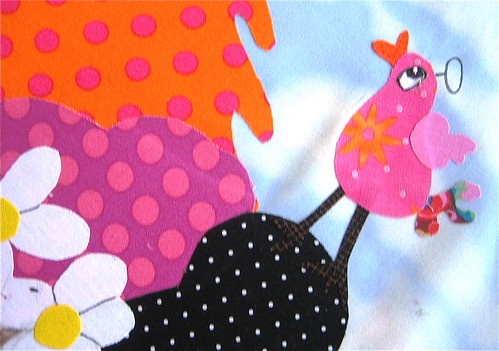
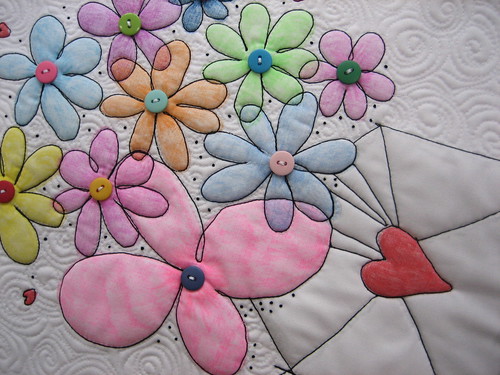
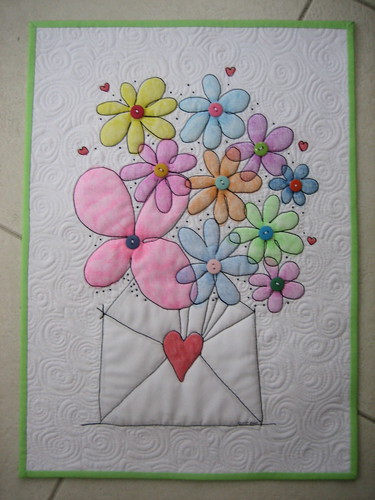
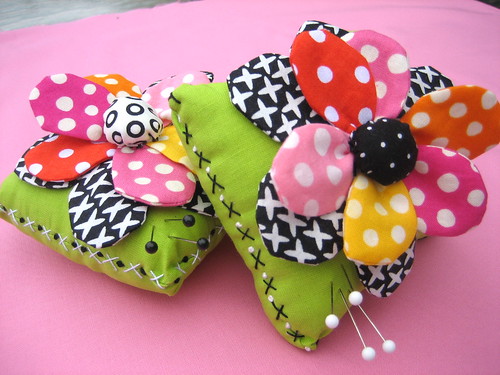
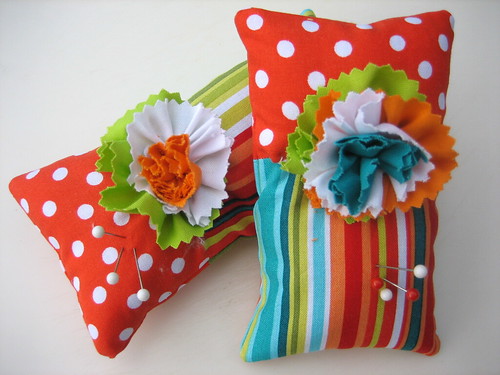
It doesn't seem like it was that long ago that one of the other mamas for DQS (doll quilt swap #9) suggested that we might have a general give away prize for an end quiz. I never really knew if it would happen, (and still don't) but volunteered to make a quilt to try to epitomize the group.....(sorry about that guys! I sorta did forget about you, I guess since this no way epitomizes you.) Anyway, I drew this about a month ago, (with the help of the loraliedesigns.com for inspiration) and though it time to put it to fabric.

First, of course, I got out my yards and yards of steam a seam (and yes, I do buy it by the yard at my local quilt shop now, if you can believe. LOL) I looked at the picture and figured I'd do it by sections so did not remove the backing from her head section while doing the bottom of the quilt. I knew I had to tuck some of her hair under her head and once ironed down, I wouldn't be able move it.
Little by little I kept cutting and fusing. I felt like a kid with my little scissors cutting all those tiny pieces.
The top took me the longest. E-gads, all those thread spools just about drove me over the edge!!!
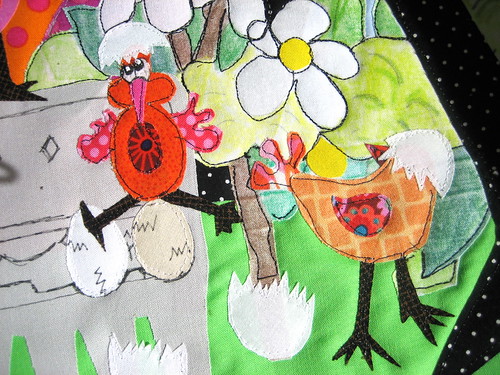
At that point, I sewed the whites of her eyes down so that I could use my crayons to tint her eyelids and cheeks and draw the fine details of her eyes as well as do a french knot in each eyeball for expression. I then ironed it with my muslin on top to set the details and crayons.

I continued in my usual manner, sandwiching the rest and using my free motion quilting, sewed all the colored fabrics down with appropriate colored threads (about a million it seemed like at the time) so that I could get the details just right. I then, used my detail pen again on the tape measure, spool tops, scissors, and inside petals. I don't know what I'd do without those micro pens, I use them so often and not just to label my quilts either. At this point it was time for my newfound love of swirl quilting (I really MUST find a new pattern, I suppose)...so after that, it was basically done except for squaring it off and binding it. And wa-la.......

DQS9 Dolly Quilt Queen

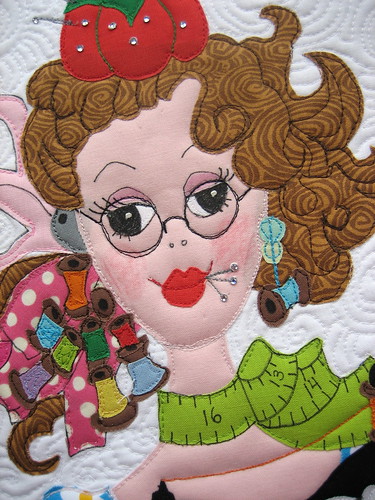
Note her jeweled pincushion crown! I actually bought crystals and glued them down, if you an believe?! A real quilt queen if you ask me!!! Too bad I'm not that glamorous, hey?! E-gads, I don't even wear lipstick most of the time.

Dolly Quilt Queen- close up

Wednesday, August 11, 2010

Flowers by Mail

Sometimes it's surprising where we get our inspiration. For me it can come from anywhere, but this time, I saw a greeting card that was especially appealing and so I copied it. I've done this before from napkins, wrapping paper, or even designs on buildings. I named my quilt, "Flowers by Mail" and you'll see why in a little while. Since I made it, I was informed by a Flickr friend, that the image was really from a stamp from the Stampin Up company called, "Send a Celebration". Here is my rendition done on paper the same size as my quilt will be:

After I drew the image, I traced it onto my fabric lightly, with pencil.

Since the greeting card was done in watercolors, I really wanted to duplicate that look, and remembered that I had recently read of a method of coloring with crayons on fabric and setting the wax with an iron to obtain a watery look. First though, I knew I had to iron a piece of freezer paper to the back of my fabric for stability so the material didn't bunch as I was coloring.

I honestly felt like a little kid again and it was probably the most fun of the whole process!

After I was done coloring and I did make my middles a bit darker for shadowing, and even used a light gray on the envelope, I removed the freezer paper, and got a piece of white muslin to put over the quilt top so that I didn't get wax all over my iron when I was setting the colors. There was a bit of a trick to that since I remembered reading that you needed to smell the wax to know when it was done. Don't iron it too much or you will scorch it.

After that, I wanted the flowers and envelope to stand out a bit from my background quilting so I decided to use trapunto. (Another new technique for me.) I cut a piece of 100% thin cotton batting bigger than my image and put the quilt top on top of it, then pinned it around the image with flat head long pins. Then, in order not to catch any unnecessary extra batting in my initial stitching, I turned it over and cut on the outside of my pins so that everything would be smooth.
Then, I used white thread in the top and bobbin and free motion stitched around each flower, heart and envelope.
And when was done with that, I turned it over and cut as close as possible around all the stitching. Note the child's scissors with blunt tip just for safety. I sure didn't want to cut into my top fabric at this stage.
Then, I sandwiched as usual, using my favorite 505 spray adhesive. I have no picture of that, I'm afraid. Next, I wanted to stitch around each flower, heart and envelope with black, so again I did something I've never done.......I used #12 DMC perle cotton. I knew that the thickness would be perfect to make my flowers pop. Only there was one problem.......first I had to thread a bobbin with the perle cotton since I have no big thread holder. It worked perfectly! I used a fine black thread in the bobbin (on the bottom). I left all my threads hanging as I was sewing each flower, and was careful not to get them in a different flower's stitching because they were thicker than I had thought. And when I was done stitching, I buried them by bringing them to the rear and burying them in the batting.

On to the background quilting which I did in my newfound swirls! Oh, so pretty! Then, I trimmed it, bound it with a solid matching green, and put some buttons and colonial knots on for whimsey and wa-la:

"Flowers by Mail" - Detail

"Flowers by Mail"

I hope this has been helpful. If you have any questions, don't be afraid to ask and I will answer them in the comment section so you all can see.

Tuesday, August 10, 2010

We have our Winners!


Do you see your name? E-gads, this wasn't easy giving away 9 things. Hubby and son were worthless.......I finally threw all the names in a bowl and picked, but then if someone wanted something that had already been decided, their name got eliminated. Not too fair, but I was perplexed on how to do this any other way. It's not like I give stuff away every day, you know! I hope you all are okay with this. Now to contact the winners and get their addresses and mail everything out. I just got back from Target with a whole mess of new mailing envelopes. I hope I get everything straight.......keep your fingers crossed. I'm pretty good at sewing, but sometimes everything else is beyond me!! LOL

Friday, August 6, 2010

Cleaning House

It's time for a giveaway!! And not just one!!!

Most folks have a big hulla-ballo on their 100 post and I, like a dummy, forgot....e-gads.....then too, it's almost time for the next Scrappy Pincushion Swap, and believe it or not, I am besieged with too many pincushions that I thought would/might be needed as angel pincushions. So.....it's time to clean house!!!! AND.....who knows, I just might continue this marathon once the doll swap is over depending on how many angel quilts are needed. But for now, and to celebrate my 104 th post, I made twin doll quilts today.......(well almost twins, 'cause nothing is exact, you know) so someone will win this (or it's twin which I'm still working on):

Pretty Pinwheels

Then......choose your pincushion cause all of these will go:

Real Scrappy Pincushions

Citrus Pincushion

Scrappy Twins

Striped Pincushions

Hugs and Kisses Pincushions

Carnival Pincushions

Just so you know that there is only 1 of the Real Scrappy, Hugs and Kisses, and Carnival pincushions left and all but the Carnival has 100 cotton stuffing rather than the bird litter. So....in order to get one of these gems, all you have to do is tell me which you like best and why and make sure I have your e-mail address so that I can contact you if you win. I'm thinking that this should go until maybe mid next week and I'll let my hubby and son decide the winners. Good luck!!!

Tuesday, August 3, 2010

"Kashmir"

In order to continue my "swirl" quilting practice, I had to come up with a quick design that would incorporate a solid white background, plus still contain elements contingent with an appropriate angel doll swap quilt. What to do? I was just about "flowered" out until I thought of trees with flowers.....and birds......of course birds......who doesn't like birds?? But flowers, again, I thought? Until I spotted a new fabric I recently bought called, "Kashmir" laying on my dining room table. It's part of the new Marylebone collection by Rowan. (If you have a chance to see the whole line, please do.........it's gorgeous!!) Anyway, I grabbed the drawing paper and fabric and went to town. After I ironed a big hunk of steam a seam on it, I started cutting:

And after I fused the tree to the background, I fused the flowers on too.

Naturally, I had to add a few leaves and stems to the flowers on the ground so once I did that, it was time for quilting. (My new favorite thing!!) And.....in case you're wondering, I use 505 spray adhesive to keep all the layers together evenly, not pins.
Once I was done quilting, I squared it off and decided to bind it with the same fabric that I used to cut out the flowers. I thought it would tie the whole thing together.

"The Happy Tree" - DQS9

My quilting is getting pretty good, huh? Maybe it's time to move on to another pattern!

Detail of Swirl Quilting