People sometimes ask me how I get my ideas, or where it all comes from and while I can't always tell them how things form in my head, or why I do certain creative things, I can explain one thing that I enjoy. I've always been fascinated with children...and how they move so effortlessly and the simple things that seem to give them the greatest joy. Girls especially! I used to just sit for hours and watch my kids play when they were little, and while my son would throw stuff and run, be tough and get in trouble on occasion, my daughter was a little lady all of the time. (At least the times that she was with me...who knows about those teenage years? LOL We won't go into that!!) Well, when I joined my first doll swap (DQS7) I wanted a gift for a good friend and designed "Someday my Price will Come" for her. She's a single mom and often she'd ask me if I thought she'd ever find another "Mr. Wonderful". Since then, things evolved and so far I have created five doll quilts of little girls. I've decided to call them "The Little Girl Pearl" series since each little girl wears pearls. (Don't ask me how that started, I haven't a clue!) Well, #5 was born yesterday and I think she's pretty cute, myself.
It starts like this....on a whim...out of nowhere.....at any time and I better have something close to transfer the ideas onto because they come really fast. This was the first sketch in a 6 by 9 1/2 inch notebook:
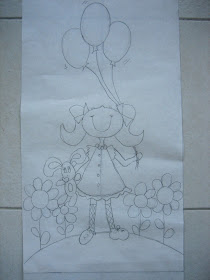
 Then I transferred that idea into a useable pattern on bigger paper:
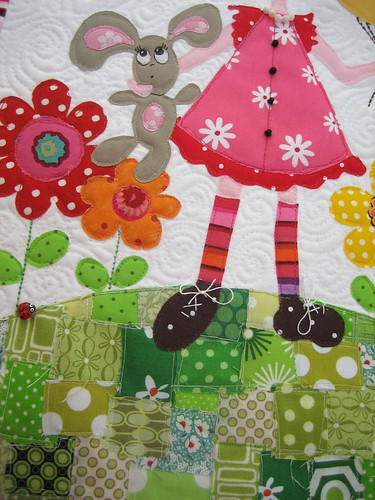
 And then I get going, cutting my base fabric to size (usually 1 inch bigger all the way around to allow for shrinkage in quilting, etc and to square it up properly when it's done) and tracing my drawing and cutting fabric pieces with the steam a seam. When it's to my liking, I iron all the pieces onto the background. It looks like this. Note, there are no steams for the flowers, only pencil lines. The same with the balloons. Oooopppps, first I pieced the grassy area. I took a piece of steam a seam and placed tiny green fabric pieces onto it and ironed it. Then, I cut it to my traced shape and carefully tore off the back piece and ironed it onto the base fabric and sewed around each square so it would stay on there forever.
 After I made my quilt sandwich, I got out my applique foot for my Bernina, and did a fancy stitch for my flower steams and the balloon stems. I could have hand stitched them, but that stitch is so much faster. (#86 for you Bernina Activa 240 users.) When those were done, I got out my #24 foot (open toe free motion foot) and sewed around each shape with the matching color thread. I use white in my bobbin all the time and never have a problem.
 Note her eyelashes! I drew them on with one of those Pigma Micron pens. I use the #02 size. I also put my initials on it in a corner and the year. Then, I free motion quilted it in my newly learned swirl quilting......soooo cool! And wa-la......add a few special touches and done!
Isn't she just the cutest????? I think this one is going in my laundry room! I'll have to make another one for the swap. :)


OMG, it is just the cutest miniquilt I saw!
ReplyDeleteShe is so cute (I'm going to keep saying that, ya know!) Thank you for your play by play and the closeups. I just love hearing your process and seeing the details.
ReplyDeleteCarol, she is just precious and I am so glad that you are going to keep her! You will smile and enjoy her every time you go in that room! What is her name? Her bunny is the cutest and I love her socks, too. What patience you have to piece and sew all those little pieces. I think you are my hero (heroine)! :) Hugs, Karen
ReplyDeleteWhat a gorgeous quilt! I love the bright colors! Soooo lovely! I wish I could draw like you!
ReplyDeleteShe is nothing short of precious! I loved reading about your process.
ReplyDeleteThis comment has been removed by a blog administrator.
ReplyDeleteOh my goodness. She is just adorable! You have such fantastic appliques. All so bright and happy and truly inspiring.
ReplyDeleteso adorable!
ReplyDeleteBeautiful, lovely, one day I aspire to make quilts even vaguely like this!
ReplyDeleteIs the lady bug a button?
ReplyDeleteCarol, if I might ask after you draw your design on paper how do you transfer it to the iron on sheets and then iron to the fabric? Would it not turn out backwards if you traced it on directly? Or am I missing something? I can't quite figure out that process. Love ALL your designs by the way.
ReplyDelete