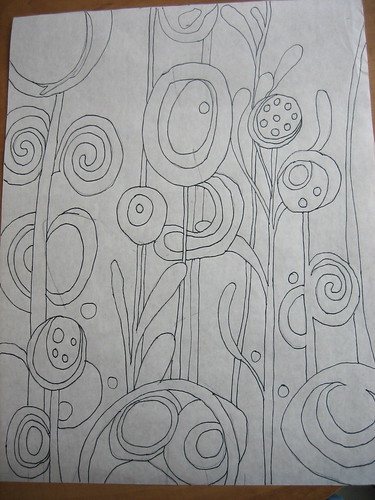
It started off like this:
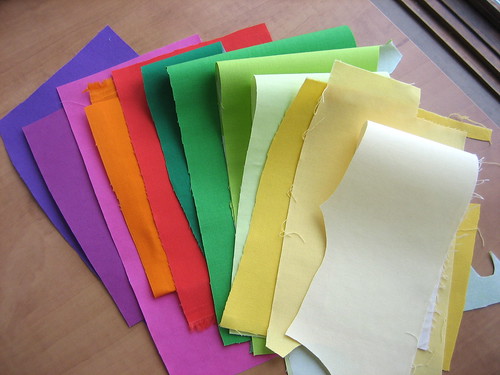
So I started gathering my fabrics and fused them:
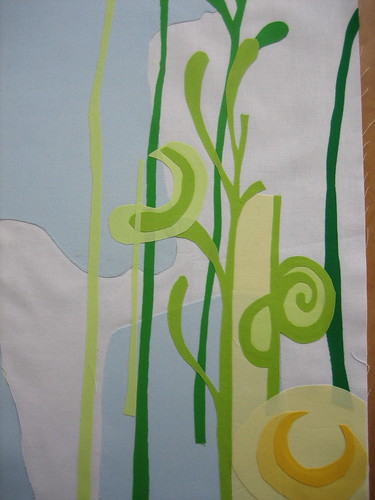
And I proceeded to do my thing after I cut a hunk of blue and fused that on first:
Eventually I had a mess going on which is the "norm" for me when I'm concentrating:
And I continued to fuse my brains out, (as my dear husband says when he comes in the kitchen for lunch) until it got to this point:
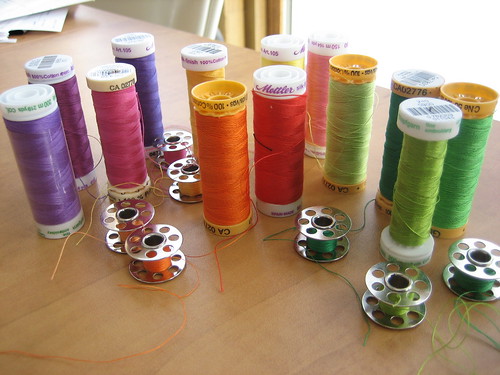
Pretty soon I was all done..........
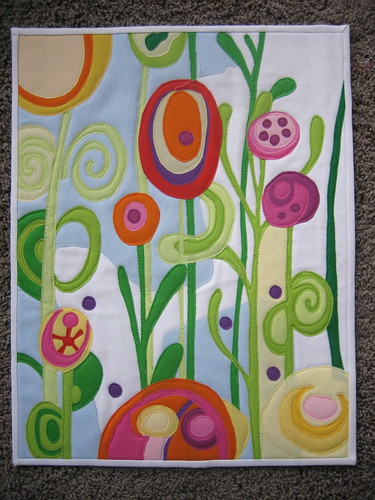
You can click on that picture to take you to my Flickr stream and read what colors I used if you want. Here's a close-up:
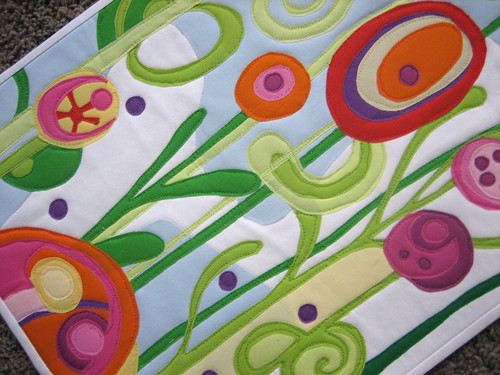
I really like it. It's a bit more sophisticated than I normally do, and maybe that's what I like about it. Actually, this was a painting that I found in someone's favorites and I knew I had to put it to fabric. I hope they don't mind, whoever it was????
And I finished off the back as I normally do, except I forgot to sign it and it is missing a dowel in the sleeve for hanging. I better do that right now before I forget.
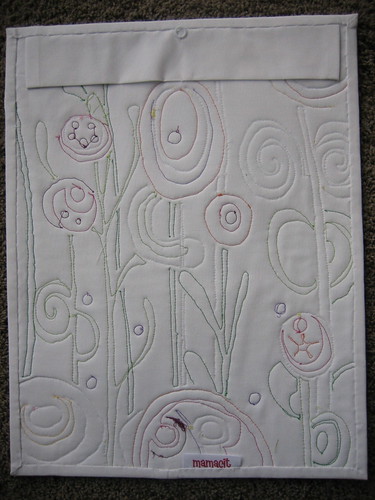
Don't look at that big glop of threads on the bottom there. A bird must have been building a nest while I was sewing. LOL Enjoy!



I love this! The colours,the shapes - everything!
ReplyDeleteWhat fusible do you use? Here in the UK only Bondaweb (possibly Wunderunder to you!) is easily available
Thanks
Lovely! I love the colors, design and quilting on it.
ReplyDeleteI always get inspiration from your posts.
ReplyDeleteSimply gorgeous!
ReplyDeleteVery cute. Makes me want to give it a try. As for the "nest" consider it a design element. I personally know how long and hard you worked to get that nest just right!! :-) :-) :-) My story and I am stickin to it!!
ReplyDeleteI am totally blown away by the colors you put together and the fact that they play off each other so beautifully. blessings, marlene
ReplyDeleteI like it! Very nice--you make it look so easy but that is a big project! ;-D
ReplyDeleteAny tips on the sewing such as machine settings. I have never done free form sewing so I thought I'd look into it.
ReplyDeleteDo you draw the pic, then cut each piece out and cut it out of backed fabric?
The is such a great colorful piece. I like the idea of turning a picture into a quilt.
xx, Carol
This is just so pretty.
ReplyDeleteIt looks to me like the blue is not stitched down, in the background. Is that intentional, or did you miss it?
Very pretty. I am wondering how long it took you to do. I know it would take me weeks LOL
ReplyDeleteI love it!
ReplyDeleteLove it! Love the design and the colors!
ReplyDeleteWow, how do you do it??? I would really like to have some of your skills :o) Beautiful!
ReplyDeleteI was asked how I did this so I'll try to explain. First I cut the white fabric about 1 inch bigger than the picture I drew. That gives me 1/2 inch all the way around just in case. Then, I took a hunk of blue and sort of eyeballed how I wanted it to look and cut it..making sure that it was tall enough for the length of the white fabric. I already had it fused with webbing so laid it on top, and ironed it down...THEN, I sewed the blue down right away since it really had nothing to do with the drawing (although I knew all the time I wanted the blue in the background too.
ReplyDeleteAfter that, I chose my fabrics and put webbing on them so that when I had my tracings I was ready. Then, I used tracing paper (some taped together for length) and traced my drawing....first the stems and leaves in the background, as you can see from the pictures. I laid the tracings on the right side of my fused fabric (sometimes pinning them on) and cut them out one at a time and laid them on the fabric base. If I was a bit off from the drawing, no big deal. (After all, this is quilting not brain surgery. LOL) When I got one section to my liking I ironed it down for stability and continued until I had everything done and all ironed. I then sandwiched it as a normal quilt and sewed each section with the appropriate color thread. Put on my binding, gave it a quick ironing and wa-la....DONE!
Love this one, Carol. You're right - it's a bit more sophisticated than your usual whimsical creations. Brings to mind your Art Quilt studies from last year.
ReplyDeleteThank you for another beautiful piece of art work for us to enjoy! Also,thank you for the "tutorial"....I might have to step outside of my box and try something like this :)
ReplyDeleteFabulous! Looks a bit like these 70´s wallpapers ;o)
ReplyDeleteSo inspirational! I love seeing your process. Your colors, as always are amazing. Just love it!
ReplyDeleteOh Wow! Fabulous Carol! Such a beautiful piece of art! (so good the birdies even made themselves at home! lol) I always pull my bobbing thread through to the top and hang onto both, stops the little birdies making themselves at home.
ReplyDeleteWow Wow Wow...You are so talented and very Inspirational, thanks for sharing.
ReplyDeleteLove this little quilt & thanks for explaining how you did it. Very inspiring!
ReplyDeleteI love it Carol and you make it look so easy. I did laugh at your comment about the bird building a nest while you were sewing hehehehe. You really are an inspiration tho :) Keep sewing fabulous things :)
ReplyDeleteFantastic piece.... Colours are great and the design is great.... a happy picture to admire...
ReplyDeleteHugz
You make it sound so easy - and realy the porocess itself is not that difficult - it is the artistic inspiration that is the difficult bit (and the free motion quilting). I really do think you should go into the business of selling your patterns so that us less artistic bodies can have some beautiful funky things around!
ReplyDeleteThanks Carol, for going into further detail of how you create your art. You probably don't even realize what an inspiration you are!
ReplyDeletexx, Carol
So fun to see your process of creating this!! Just beautiful! Looks like lots of work but something that would be really fun to dive into.
ReplyDeletelove your answer to how...yeah for you Voila, done....love it and your home in the circle..downright inspiring you are.....
ReplyDeleteahhhhh I can breath sew much and then I faint when I see your "stuff" lol
I am ALWAYS amazed at how you can take or MAKE a drawing and turn it into fabric!! It is SEW easy for you but not sew much for me. However, YOU have inspired me to go for it. I like your attitude of everything doesn't have to be so perfect. I get caught up in making everything perfect and lose the fun of it. Also, I notice you don't zig zag around your fabric. SEW much easier. Ok, I'm going to give it a whirl.
ReplyDeleteI absolutely love your creations and your blog is one of my TOP Five. I read every NEW Post!!!!
Gmama Jane
Ooops.....I think I forgot to tell you one thing on my explanation of the process. After I sew everything down, I trimmed the outsides of the quilt before I put the binding on.......I'm sure you knew that, but i didn't want anyone to be confused.
ReplyDeleteGorgeous! So creative..you are so good in fabric color selection. The result is amazingly pretty!!
ReplyDeleteYour color looks like a breath of spring which we all love- very creative and inspirational and FUN-your blog rocks
ReplyDeleteWow, this is a beautiful quilt especially on a cool blustery day like today.
ReplyDeleteI have a question, where do you get your "mamacjt" labels? Are they folded over? Or is it just one flat label sewn in the binging? I love your projects! They're so original!!! :)
ReplyDeleteI came over from Stashmanicure blog. Your creations are truly inspirational. I see that you use Mettler thread, too. Love them!
ReplyDeleteI love this!! You are incredibly talented!! Wow!
ReplyDeleteWow, this is simply wonderful! I really, really like your style!
ReplyDelete