
Just the other day, when shopping at my neighborhood quilt shop, I picked up a new book that was lying on the counter just because of the awesome letters and numbers. (I can draw, but quite honestly, my letters really suck so I thought this might help)?? LOL That night, when I had some time to page through the book, I actually read the instructions and came to the realization that I have been doing applique WRONG all this time. Me.....the applique queen? Wrong??? Apparently, everyone actually prints their patterns backwards.......WHAT??? And puts them on the fused fabric that way??? On the backside? Why?
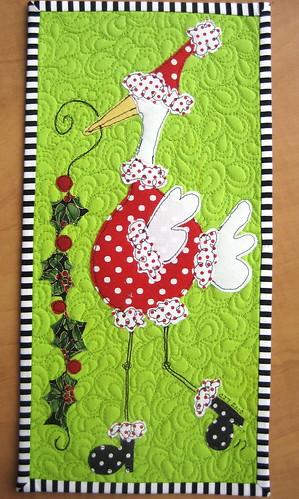
Let me tell you how I do it. First, of course, you need a pattern......in this case, we will use my latest, "Goosey Lucy". She didn't turn out as cool as I thought, but what the heck?
 First, I cut my background fabric the same size as my pattern, OR sometimes, slightly bigger to accommodate the eventual quilting, or maybe just because I think I need some extra on the sides. (I tend to draw right to the line and forget that the binding will cover stuff up.) Duh!
Then, I choose my fabrics for each of the things I want colored in the drawing. In this case (which is really unusual) I used a colored background so I had to be more careful with fabrics that didn't clash. When I am sure of my choices, I check out the pattern for approximate sizes and cut my fabric to the size I think I'll need and iron fusing web to all of the squares or rectangles. I might use a bit more fabric this way and fusing stuff, but believe me, it's soooo much easier. (And you don't make a mess of your iron or ironing board cover either.) So here we have most of the fabrics I choose with the fusing stuff already ironed on the back (although I think there's a fabric missing......oh well...
 Then, get yourself some tracing paper at the office supply store and grab a nice pencil and trace the items you want to applique right from your drawing. (You might have to number different things on the drawing and on the tracings to keep them all straight if there are lots of items with the same fabric.) Then, you put those tracings on top of the fabric (right side up) and just cut them out, one by one until you have the whole thing done. (Number the back of the cut out pieces if you have lots with the same fabric following your numbering system from before.) See the three pieces of white with red dots? They are numbered 1, 2, 3 on the back....the same as the original drawing.
 You can do it in sections of you want and when I have something pretty big, I do it in sections too, otherwise, you'll go nuts and won't remember what is what. (Been there, done that!!) SO...when you are done with the tracing and cutting, take the drawing, the background piece of fabric and your "cuttings" over to the ironing board, and as close as possible, position the pieces onto the background fabric until you have it to your liking. (Often I will place the original drawing right on top of the fabric to get an idea of the placement of the first few pieces.) Do not iron anything until it is to your satisfaction, and once that is done, you iron the whole mess down at one time to fuse it forever. Then, just finish it in the normal manner.
 And when you're done, you might have yourself a "Goosey Lucy" huge mug rug too which is almost big enough for a sheet cake. LOL (I did get a bit carried away with this one!!)
12 comments:
plan...draw...trace...hmm...thats what I have been doing wrong. I just cut and go (skipping over all those steps) Hasn't worked out too well. Thanks for sharing what you do.
Lucy is adorable!
And let me tell you, I screwed up some fabrics by ironing the fusing onto the right side of the fabric...Wouldn´t happened if I followed your way!
Anja
Thanks for the step by step. It's great to see your process. Love Goosey Lucy.
Guess I don't see how you were doing it wrong--at least you know for sure which direction yours will end up without accidentally forgetting to flip it so the whole thing ends up reversed (yeah, ask me how I know this). Besides, if doing it your way is wrong and you get those results, then I want to be wrong too! Love Lucy--too cute!
I love your finished piece...and I like the ease and simplicity of your technique. I say, as long as it makes you happy...go with it! No right and wrong as far as I'm concerned!
Happy Sunday.
xoxo
Donna
Lucy is the goose with the mostest, I love her! And your mctavishing fill-in quilting is outstanding, Carol!! I must learn how to do that. Your method sounds really good, I've always traced onto the back of the fusible and now I won't have to. One other tip I learned is to make a vinyl tracing of your drawing and use that over your background piece (pin together at the top) to help place your applique bits, just lift up the vinyl and adjust the bits underneath, returning the vinyl down to check placement. It is one more step, but if you have a v. complicated pattern it can be very helpful!
Just delightful...love the kicky foot in the back & those ruffles socks!!! Too funny!
Your free motion quilting is more & more awesome with each project, Carol. I'm going to go practice some more today.
The cutest goosiest quilt I have seen! Love everything about it and your technique as well.
I have just used your technique to make a flower pattern for a book bag I'm making for a Christmas gift and it's worked a treat. Thank you!
This little tootsie is so cute that it makes my heart sing!
Thank you for taking the time and showing us how you create such beautiful and unique projects :)
Thank you so much!!! I just found your blog today. I've been wanting to make an applique picture, but had been unable to find the right technique. I've had my drawing for 3 years and I think the time is finally right.
Post a Comment