Do you remember this:
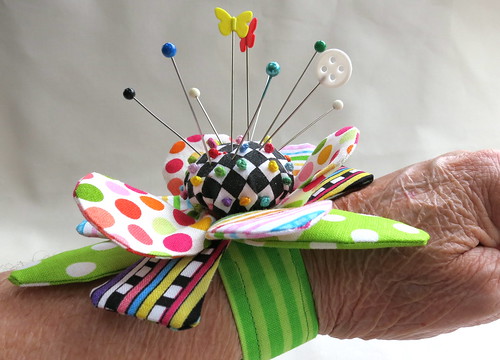
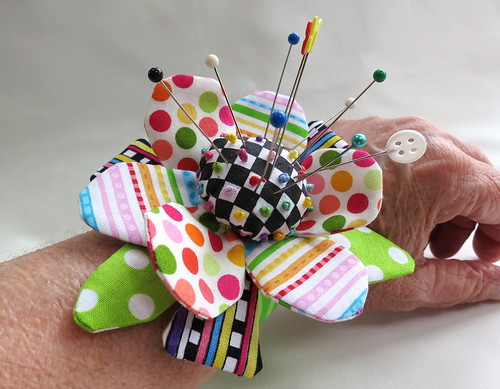
Well, that one I stuffed with polyfill, but I have found a better way and for sure, you won't poke yourself with this one! Use a 1 1/2 inch styrofoam ball for the inside. Cut off 1/3 of it though so it lays flat against your wrist. I made a few for my local quilt shop and wrote the pattern which I will show you:
Cute, huh? Needless to say, they are promoting the new Moda "Summerville" line! I urge you all to shop your local quilt shops. So many shops are going "under" now because of the on-line shopping and it's sad! Personally, I'd much rather feel and see the fabrics I want to buy in person, wouldn't you?? I probably could write a whole post on this subject, but today our focus is on pincushions so here we go.
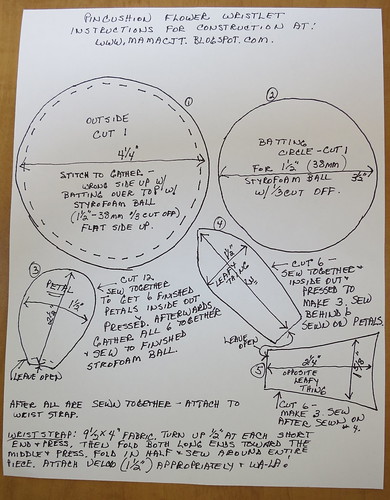
I wrote the pattern with sizes for the pieces (which will be given away at my LQS soon)............but you will have to click on the picture and then go to "actions" on the top left and then click on "view all sizes" to read it easier. I wish I knew how to do a PDF file for you all, but alas, I am an OLD sewer and not a NEW computer whiz like so many of the young people of today!! I'm sorry! IF you can, follow the next few pics which should explain the process:
First, cut 1/3 off your 1 1/2 inch (38mm) styrofoam ball. Put that inside a cut piece of batting, and put that over the cut (wrongside) outside fabric (which will be the pincushion part of the corsage). Keep the flat side of the ball up. See below:
Sew around the edges gathering it together to cover the ball. Sew back and forth for strength. (I used #12 embroidery floss for sewing as it was stronger.)
Cut out all your petals, (12 to make 6 turned inside out petals), leafy things (6 to make 3 turned inside out leafy things) and the straighter pieces (again 6 to make 3) and sew and turn inside out so that they all look like this:
Gather your petals as shown:
Sew them to the sides of the finished ball (now with the flat side of the ball towards the sewing).
At this point, it should look like this. It's a different inside ball, but you get the idea, I'm sure.
Now, take the 3 leafy things, and equally space them to fit in between the spaces of your petals and sew them to the petals. Next, do the same with your straighter pieces:
So far, so good! Idiot me forgot to take any more pics, so here we wing it..... Take a piece of fabric 9 1/2 inches by 4 inches wide and fold in both short ends 1/2 inch and press. Next, fold the long ends in towards the center so that they meet. Press well! Fold in half again lengthwise and sew around entire piece. This is your wrist piece! Attach 1 1/2" to 2" of velcro to each appropriate side and sew your finished flower in the middle. Wa-la! Now you SHOULD have a beautiful wrist pincushion! Here is how my original looked from the side:

Good luck and have fun! I was thinking after I was done that not are they darling wrist corsage pincushions, but they also could be used for napkin holders too for perhaps a garden luncheon. Now, wouldn't that be fun???


7 comments:
Oh, I do like the idea of using them as napkin holders! I only wish my local fabric shop had modern fabrics. If they did, I would be happy to shop there.
If you make the wrist band a little larger you could loop it around the neck of your sewing machine and have the flower sit on top.
Very cute.
Love these! Such a cute design! Just read your About Me below, and it cracked me up! You and I have a lot in common! My husband may not know what a walking foot is, either, but he sure knows what fussy cutting is! Lol.
Oh my goodness you are a doll for sharing this beauty. Now when will I find the time to make it?????? Thanks Carol x x
I remember seeing a wrist pin cushion design where they used a bottle cap or a plastic lid in the base to prevent the pins from sticking through and poking. I can't find it right now, but I'll let you know if I do.
Muy bonito y para trabajar bien.
Felidades por tu trabajo.
Besos desde El Puerto de Santa María, España.
Mamen
Very nice and work well.
Congratulations on your work.
Kisses from El Puerto de Santa Maria, Spain.
Mamen
Thank you for sharing the process, I might need one of these soon.
Post a Comment