
Isn't this cute? It's just the perfect project to do with your older kiddos too! And they look so adorable on a tree!
I wasn't quite sure what I was going to do with all these when I cut them up into 2 inch squares the other night, but I was sure I'd come up with something...........and then......the next morning it came to me.....

First, gather your supplies. You will need your 2" fabric squares (about 50 for each ball), glue, 2" styrofoam balls (I got mine at Michael's.....12 for $4.99 without a coupon), ribbon, cording, or rick rack for the hanger, and a poker object.....I used the opposite end of a paintbrush, but a think chop stick would work too. Just look around your house. If your kids are doing it, you surely don't want something they could get hurt with.
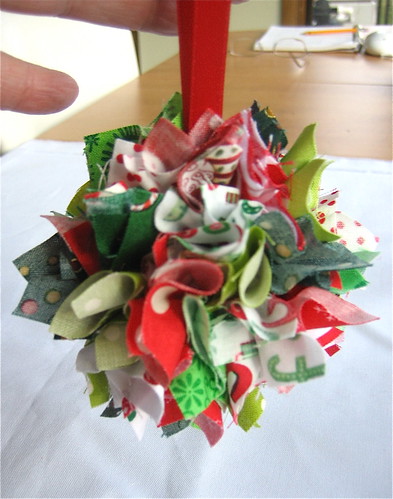
 First cut your ribbon, or cording into an 8 inch piece, put a dab of glue on your styrofoam ball, double your ribbon, and stick it onto the dab of glue with a stickpin. (I didn't take a pic of that, thinking it was pretty simple). Then, I put a ring of glue on the ball, around the hanger, and took a 2" fabric square, (right side down) and poked it into the styrofoam ball about 1/2 inch. I continued around the ball in the same manner, making sure no spots were showing until I got all the way around, filling it up as I went.
 Here I am poking the fabric into the ball. My son was kind enough to take these pictures since I don't have 3 hands. LOL (Although sometimes I wish I did!!)
 This pic was too far away, he decided, but I thought it was interesting with all the fabric squares in their own little pile.
 When you're done, if you cut enough squares in the first place, and you watch a football game like I did while I was doing this, you'll have quite a bunch when you finally run out of squares:
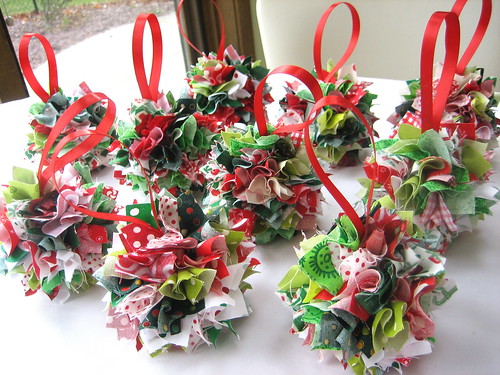
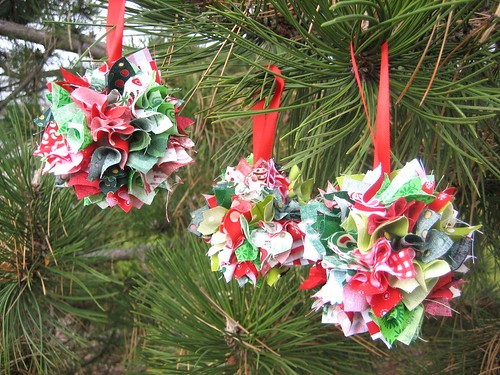
And don't they look cute hanging on a tree? (Here I am running outside to our one and only pine tree again!)
These would make wonderful teacher's gifts too. Especially if your little ones help by giving you the next 2" piece if nothing else. Have fun!
14 comments:
Carol, you personify 'working in a series' - I can't believe how many you made!!! what a super idea - these are beautiful and a great way to use up my treeskirt scraps!
Very cute, colorful ornaments and they actually look like they are fun to make!
Absolutely D-A-R-L-I-N-G!
What a great use for all your scraps! I see all your recent project in those. LOL
This is brilliant - I'm going to make these for gifts this year, thank you so much for showing how to do this - I LOVE THESE!!!
Thank you so much for this post! This will be perfect for a weekend project with the kids, and great gifts too!
These are super cute!! I can just see my tree covered in these. :) Oh, and the kittens can't break those! :D
These are so dang cute! thanks for some directions too...when I first saw them, I started right away to see if there was any instructions. So glad I decided to check out you blog.
Again, these look great!
So cute Carol!! I agree, they look great on the tree!
Love your ornaments, Carol! Great idea to do with the kidlets. :-)
xoxo
Donna
Que coisa mais linda!Adorei uma otima opção pra arvore,eu quero!
These are SO cute! Wish I had seen this a week ago so I could make some for a fund-raiser that starts tomorrow!
I absolutely LOVE LOVE these balls!!! I HAVE to make one tomorrow
Blessings
Jane
Thanks so much for sharing! Can't wait 'til my granddaughter visits so that we can make these.
LOVE LOVE LOVE THESE...wow, your blog is so inspiring!
Thank you.
Post a Comment