
I think more than anything else, people ask me how I do my crayon method of quilting. I thought I had explained it many times, but perhaps once more is needed for understanding. I have done several of these quilts. Some have had borders and some not. Some even had trapunto. Lately, I have been just making up a design on paper and doing rather simple things. I think the addition of buttons add a lot and maybe the quilts look fancier because of them, who knows? So, I will try to explain the method again. Unfortunately, I don't have pictures to go along with all the directions.
First, take a plain white sheet of paper and make a design that is pleasing to you. Make sure that you have used most of the paper because any areas left unsewn later, might gap. Do your drawing to scale. (In other words, make the drawing as big as you want your crayon quilt top to be excluding any borders you might want to add later.) This is mine. I called this one, "Bloomin'"
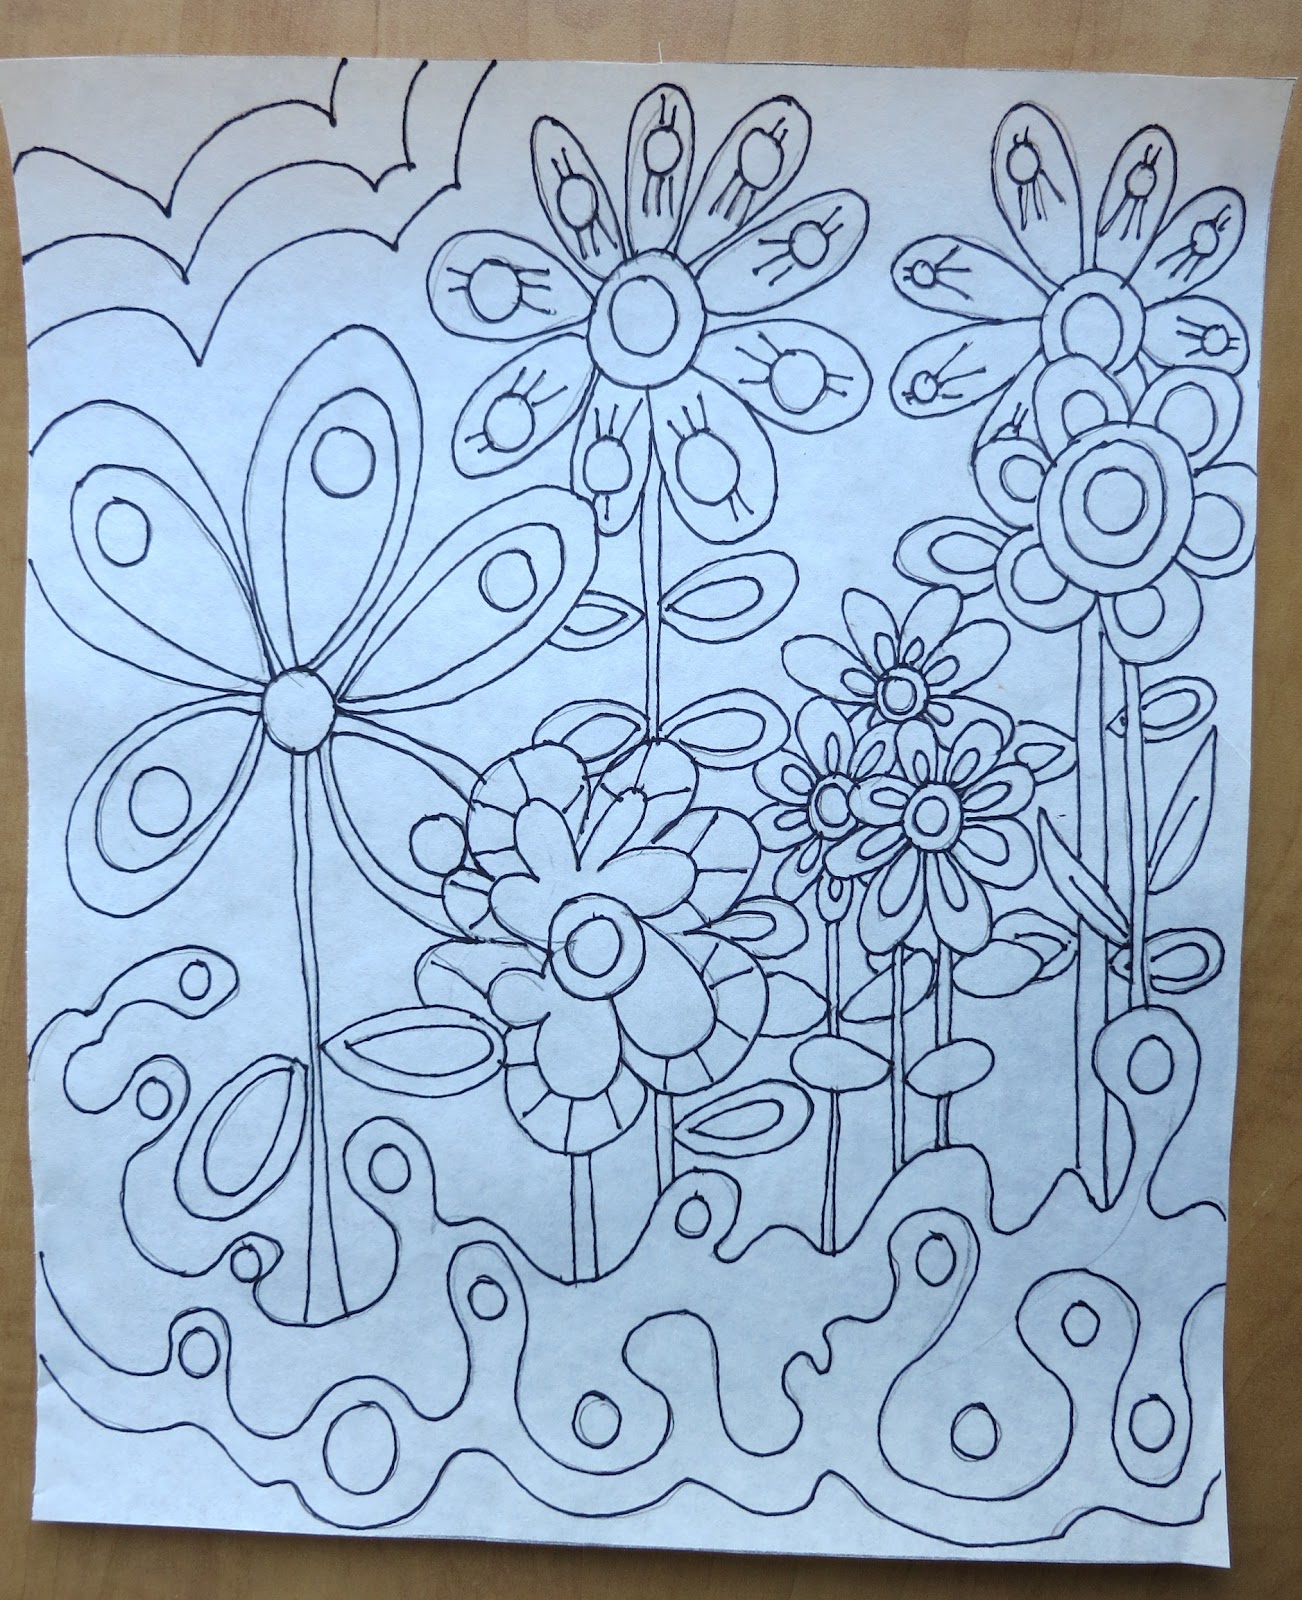
Note that I left several areas with circles. I do circles to represent where I will place my buttons later although sometimes I do color those spaces too. When you are satisfied with your drawing, go over it with a black sharpie pen. This is so you will see the design through your white fabric.
Now, iron and cut a piece of white fabric 1/2 inch bigger than your drawing. (Lengthwise and widthwise). This is in case things are not exactly even when you are done quilting it. When you are done, take your fabric and lay it over the darkened drawing, making sure the drawing is centered. Now, trace your design onto your fabric lightly with pencil. When you are done, take a piece of freezer paper the size of your fabric and iron the shiny side of the paper to the backside of your traced design. This is to give the fabric the stability to color on it without the fabric wrinkling. Using your Crayola crayons (at least that's the brand I use), color the fabric staying in your penciled lines. When you are satisfied, remove the freezer paper, and take the colored piece to your ironing board. Cover it with a cheap piece of muslin and without going back and forth, iron the piece section by section until you smell wax. This is making the crayon a permanent part of the fabric.


This is one of two with flowers that I did recently. The other one I sold to the craft coordinator for Blumenthal Lansing Co. (The biggest button distributor in the world). It will be on display in their booth at the quilt show in February so look for it there. The one above was done for a swap. It's already sent, but the recipient hasn't gotten it yet. Won't she be surprised?
I made one more for that swap. It's not my usual style to be sure, but I thought I might be able to fool the group into thinking it was someone else'. I was wrong! I called this one, "Touch of Asia."

Check out that 1/8 inch straight line quilting. I thought I'd never get done!! Good thing I have a big stash of white thread, huh? So, that's the scoop for today! Not much else new here! Until next time.....
25 comments:
Again I am drooling over the piecing & quilting you do ~ fantastic!
~ann~
This could be fun to do for postcards. Must try it. Thanks again for the instructions.
Thank you for sharing your process! As a new reader, I am happy to know how to do something like this! You are a true inspiration!
Jane
Thank you for sharing your process again!!! I recently scrolled through your previous posts looking for your method. Love these quilts of yours!
This would be a great children's art project WITH adult supervision and an adult manning the iron. Wait til that art teacher sees it!
I think I'm going to try this the next time I'm in the sewing room with the 'grands'. They love to color and we make lots of abstract art on paper, so this is the next logical step. Thanks for the inspiration (again).
This is lovely, I have done this a while back but it was with stitchery not quilting. Must habve a go!
Another beautiful design! Love it. Thank you for explaining the crayon quilting again.
yay! you shared the process again. i'm going to try it with B sometime-- might be neater than fabric painting. and i don't usually like neutrals, but your touch of asia quilt could change my mind. it's lovely!
Thank you for sharing the process again....love your beautiful designs!!!
love it, can't wait to try it. thanks for teaching us!!
I love your crayon quilt, just hope its on its way to me....that would be a surprise.
Love, love the graphic quilt. It's wonderful!
Thanks for this clear explanation. You had explained it before but it's good to get more details. The last picture with all the quilting - oh my, how long did that take? Great result, though.
I love what you do! You always inspire me!!!
I love your vivacious style, but the odd one, "Touch of Asia", speaks to me even more. That's of course, because the quiet and simplicity are more me. Absolutely delightful!
Thanks so much for sharing your crayon process...makes me want to break out my box of Crayolas! It's always fun to visit you here!
Hi, I emailed you a few days ago about ordering your pattern for your Oh Joyful tree skirt. Please email me if this is still available. :)
Becky
beckyp382@gmail.com
Wow, Carol, thank you so much for the tute, I'll have to try this technique some day !!! Your work is AMAZING as always !!!
xoxo
this is fabulous as well! i love the neutrals...so striking!
Fabulous tutorial.
Here in Australia, we don't have Freezer paper, is there something else we can use?
Thank you
Trish
I have had a lovely time looking at your posts. Lots of good ideas.
Unbelievably awesome! I want to try this NOW, but as important, I want to do this with the wee ones. What an incredible way to preserve their artwork. I will be linking on WeeFolkArt.com's Facebook page. Thanks so much for sharing your talents so generously :)
Well this is a first for me, so I'm glad you decided to repost your works of art with the know how. Looking forward to giving thing this a go around. Thank you!
wow, this is gorgeous. I never thought of using crayola crayons before.
Will have to try it.
Post a Comment